Lesson 13: Floating elements (floats)
Lesson 13: Floating elements (floats)
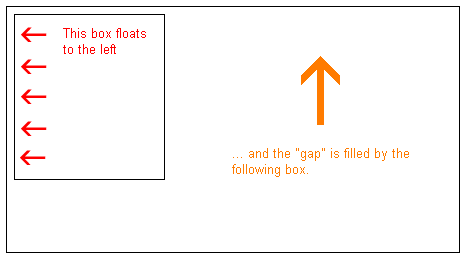
An element can be floated to the right or to left by using the property float. That is to say that the box with its contents either floats to the right or to the left in a document (or the containing box) (see lesson 9 for a description of the Box model). The following figure illustrates the principle:

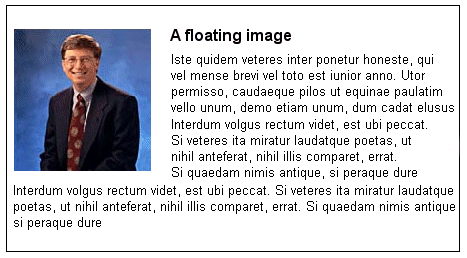
If we for example would like to have a text wrapping around a picture, the result would be like this:

How is it done?
The HTML code for the example above, look as follows:
<div id="picture"> <img src="bill.jpg" alt="Bill Gates"> </div> <p>causas naturales et antecedentes, idciro etiam nostrarum voluntatum...</p>
To get the picture floating to the left and the text to surround it, you only have to define the width of the box which surrounds the picture and thereafter set the property float to left:
#picture { float:left; width: 100px; }
- Show example
Another example: columns
Floats can also be used for columns in a document. To create the columns, you simply have to structure the desired columns in the HTML-code with<div> as follows:
<div id="column1"> <p>Haec disserens qua de re agatur et in quo causa consistat non videt...</p> </div> <div id="column2"> <p>causas naturales et antecedentes, idciro etiam nostrarum voluntatum...</p> </div> <div id="column3"> <p>nam nihil esset in nostra potestate si res ita se haberet...</p> </div>
Now the desired width of the columns is set to e.g. 33%, and then you simply float each column to the left by defining the property float:
#column1 { float:left; width: 33%; } #column2 { float:left; width: 33%; } #column3 { float:left; width: 33%; }
- Show example
float can be set as either left, right or none.
The property clear
The clear property is used to control how the subsequent elements of floated elements in a document shall behave.
By default, the subsequent elements are moved up to fill the available space which will be freed when a box is floated to a side. Look at the example above wherein the text is automatically moved up beside the picture of Bill Gates.
The property clear can assume the values left, right, both or none. The principle is, if clear, for example, is set to both for a box, the top margin border of this box will always be under the lower margin border for possible floating boxes coming from above.
<div id="picture"> <img src="bill.jpg" alt="Bill Gates"> </div> <h1>Bill Gates</h1> <p class="floatstop">causas naturales et antecedentes, idciro etiam nostrarum voluntatum...</p>
To avoid the text from floating up next to the picture, we can add the following to our CSS:
#picture { float:left; width: 100px; } .floatstop { clear:both; }
- Show example
Summary
Floats are useful in many situations and will often be used together with positioning. In the next lesson we will take a closer look at how to position a box, either relative or absolute.


